When you provision updates, the PCE recalculates any changes made to rulesets, IP lists, services, label groups, and security settings, and then transmits those changes to all VENs installed on your workloads.
When your PCE has changes that need to be provisioned, the orange badge on the Provision button indicates the number of changes that need to be provisioned.

Items that Require Provisioning
The following security policy items must be provisioned before they can take effect:
- Rulesets
- Rule notes
- IP lists
- Services
- Label groups
- Security settings
- Virtual services
- Virtual servers
Provision All or Selected Items
When you create or make a change to security policy items (such as rulesets, IP lists, services, label groups, and security settings), you can provision the item immediately from the item page after you save the change.
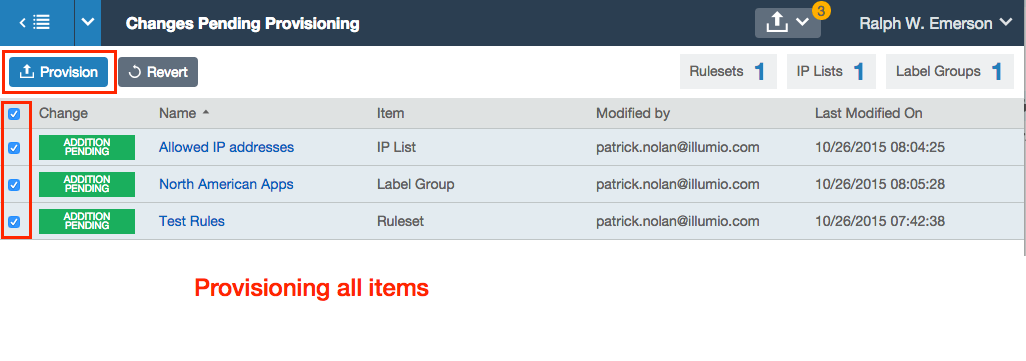
You can click Provision button on the top PCE web console toolbar, which allows you to see all of the security policy changes that require provisioning. The list shows any items that have been modified (gray) or deleted (red), or added (green).
In the list of changes requiring provisioning, you can select all items, or select items individually to provision.
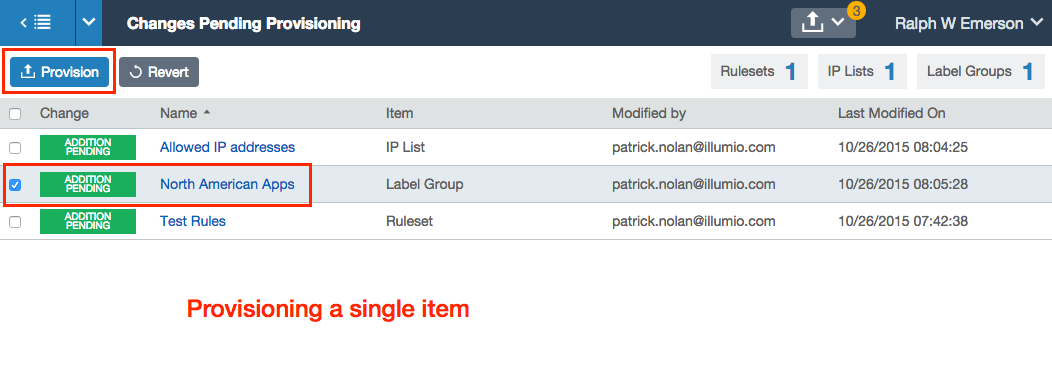
Dependencies for Partial Provisioning
When you select only some items to provision (rather than provisioning all policy item changes), some of those items might have dependencies that are also provisioned. Before you commit to the provision, the PCE shows you the items that are dependent and will also be provisioned:

You cannot partially provision resources with more than 500 dependencies. All changes must be provisioned at the same time.
Active vs Draft Versions
Any changes you make to security items, such as rulesets, services, IP lists, label groups, and security settings, need to be provisioned. All the changes you make to those items are considered to be in a “draft” state (un-versioned) until you provision them. After you provision your changes, those changes become the “active” version.
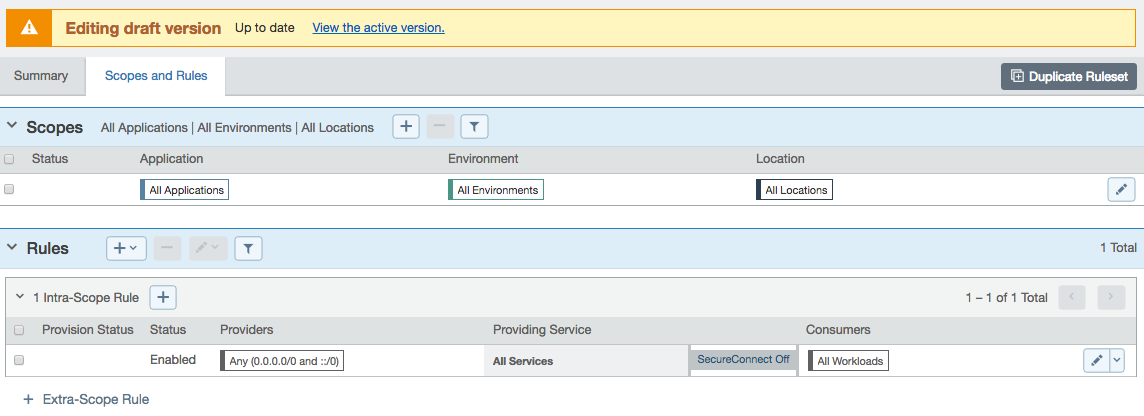
When you edit a security item that has been published at least once, and new changes have occurred since the last provisioning, you see a note at the top of the page that indicates the item is currently in draft state.
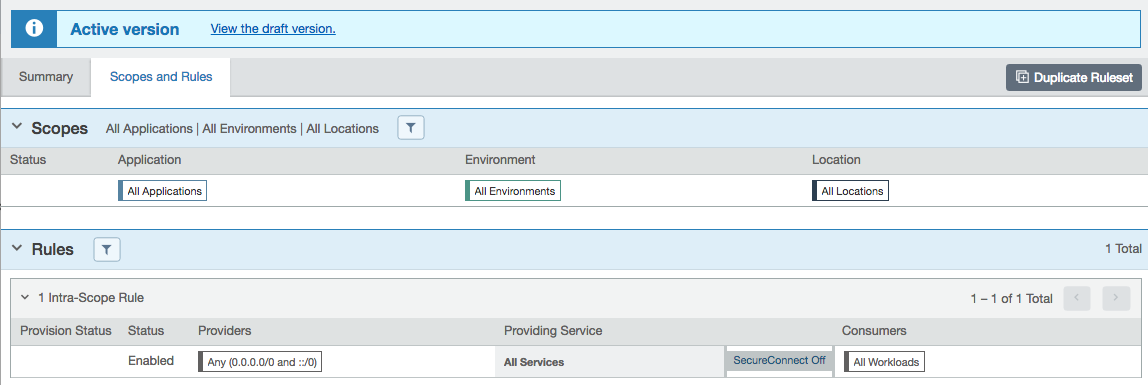
If you want to view the active version, click the View the active version link.
Example: Draft Version of Ruleset
Example: Active Version of Ruleset
Provisioning Progress Indicator
When you confirm provisioning by clicking Confirm & Provision, the Provisioning progress indicator displays the number of workloads that need to be synchronized with the latest provisioned policy changes and the progress for applying the policy changes to those workloads.
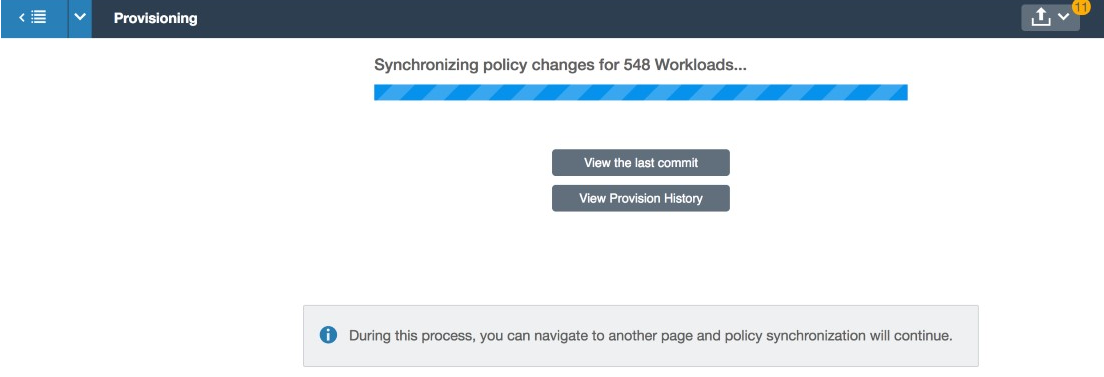
On the Provisioning page, you can:
- View the previous policy change by clicking View the last commit
- View a list of provisioned changes by clicking View Provision History
If multiple subsequent policy changes have been provisioned, the number is the total number of workloads that have not yet received all provisioned policy changes, not just the most recently provisioned changes.
During this process, if you navigate to another page, the policy synchronization will continue and a window in the lower-right displays the number of workloads pending synchronization with the latest policy.
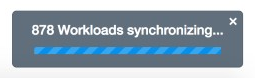
To return to the Provisioning page, click the window in the lower right corner or select Provisioning from the drop-down Provisioning list.
When the provisioning completes successfully, a confirmation message displays.
If multiple users simultaneously provision changes, the Provisioning progress indicator is updated to show the new changes, so all users will see the same Provisioning progress indicator.
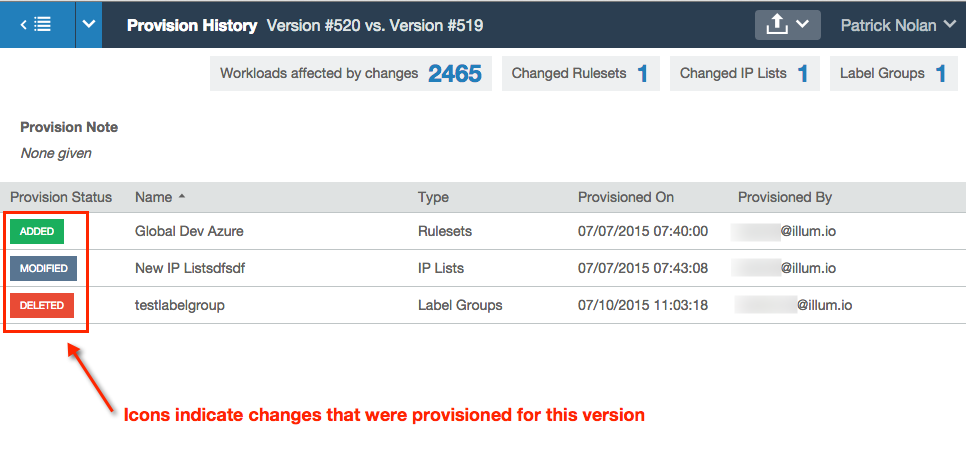
Provision History
Each time you provision changes to policy items (such as rulesets, services, IP lists, label groups, and security settings), the entire set of changes you provisioned receives a version number. You can view the history of your provisions and you can view the differences between two successive versions.
For example, you provisioned 10 times. You can review the differences between the most up-to-date version (10) and the preceding version (9). Additionally, you can view the differences between any two versions. For example, you can view the difference between version 9 and 8, and versions 8 and 7.
You can select a previous version to see individual policy items that have been added, modified, or removed for a specific version. By default, the PCE retains only the last 1000 versions of the policy and automatically removes the older versions for improved performance. When a new change is provisioned, the oldest version of the policy is removed.
To view the provision history:
-
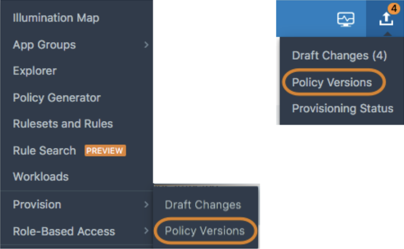
From the PCE web console toolbar, click the Provision button and choose Provision History.
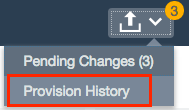
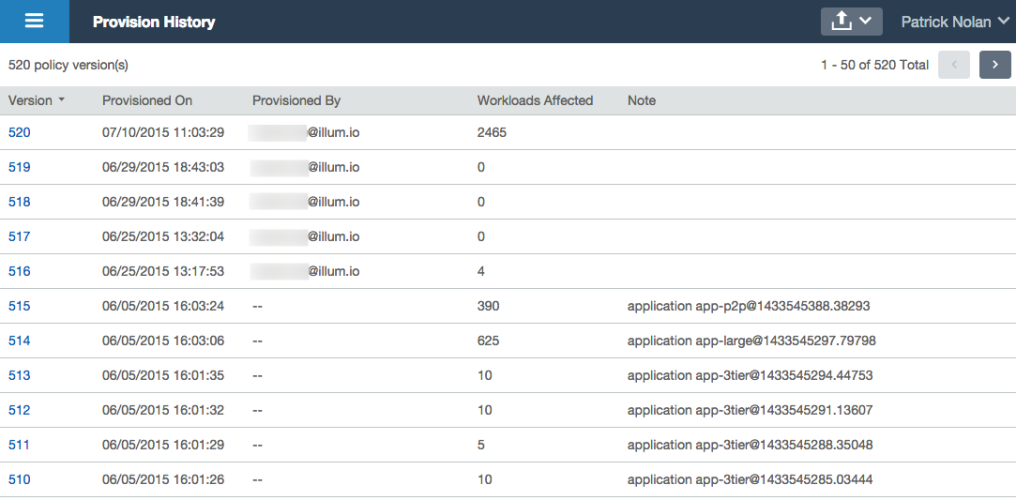
The Provision History page appears, which displays the history of the last 1000 provisions in your organization.
-
To view details about the changes, click one of the items. For the selected item, you can see the changes that were provisioned in this version.


Provision Changes
If you have made any changes to provisionable objects, such as rulesets, IP lists, services, label groups, and security settings, you need to provision those changes before they can take effect.
-
From the PCE web console toolbar, click the Provision button.
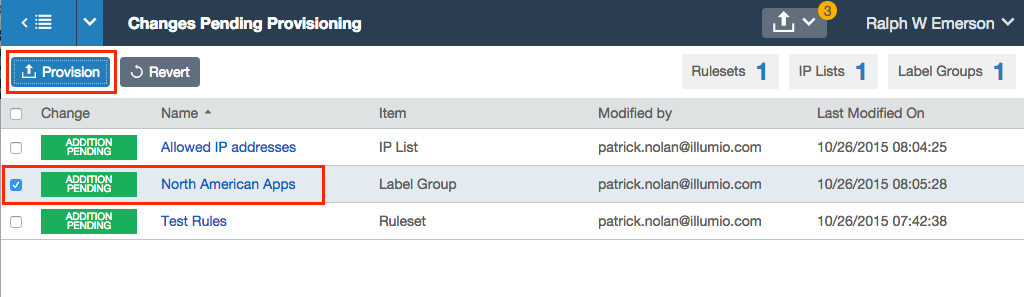
The Changes Pending Provisioning page appears, which displays a list of all policy items that have been added, modified, or removed. The top of the page shows a summary of changes based on item type.
- Select one, several, or all the items you want to provision.
-
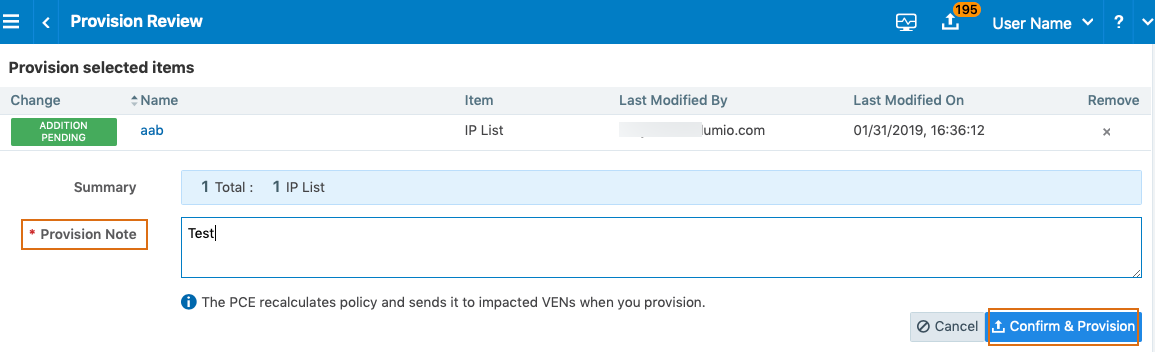
Click Provision to see a preview of the changes that will occur when you provision them.
NOTE:When you selectively choose items to provision, some of those items might have dependencies that are also published. Any object dependencies are also be provisioned.
-
You can add a note to the provision. If a note is mandatory, the Confirm & Provision button is grayed out unil you enter text in the field. After you enter appropriate text in the field the button is enabled.

For information about making provisioning notes mandatory, see Provisioning Note Setting.
- Click Confirm & Provision to push all the policy changes to workloads.
Revert Provisionable Changes
Any changes you make to policy configuration items (rulesets, IP lists, label groups, services, or security settings) appear as pending provisioning. You can revert those changes before you provision them.
-
From the PCE web console toolbar, click theProvision button.
The Changes Pending Provisioning page appears, which lists all security policy items have been added, modified, or removed. You also see a summary of changes based on item type.
-
Select individual items to revert or you can revert all changes.
- Click Revert.
Restore Policy
With the policy restore feature, you can revert to an older version of the policy when the newly provisioned policy did not work as expected.
You need to be a Global Administrator or Global Organization Owner to use this feature.
The older version of the policy is copied to the current working draft version. You can immediately provision it to replace the version that is not working.
When there are pending changes, you cannot restore to a previous version. If you try to restore to this version, it will result in references to deleted non-versioned objects such as labels and workloads, the restore will fail, and an error message will be displayed.
To revert to an older policy version:
-
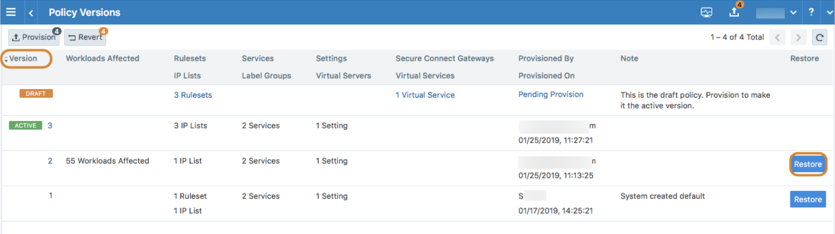
Choose Provision > Policy Versions from the PCE web console menu or from the top-right provision menu.
The policy versions are displayed under the Version column.
-
Click Restore for the policy version that you want to revert to.
-
Click Save as Draft to restore the policy to the selected version.
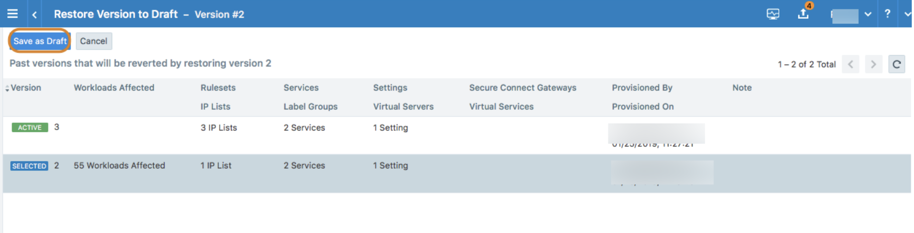
-
Review the draft changes and click Provision to restore the policy to the selected version or click Revert to return to the Policy page.

Provisioning Note Setting
You have the option to make a provision note mandatory before you provision rules. It is disabled by default, but you can enable it to make it mandatory. This feature supports the need to describe context before provisioning and can support your organization's internal workflow. When it is enabled, you have to populate the note field before provisioning changes.
You might want your users to populate the Provision Note field with a link to your internal bug tracking system or project number for tracking and the error message they see when they leave the field empty will remind them to do so. Illumio Core does not validate the content entered in the Provision Note field.
When enabled, you cannot provision updates until you enter text in the Provision Note field. The Confirm & Provision button is grayed out. After you enter appropriate text in the field the Confirm & Provision button is enabled and you can provision the update.
You must have the correct role and permissions to access this feature. If necessary, contact your Illumio administrator for assistance.
To make the provision note mandatory:
-
From the PCE web console menu, choose Settings > Provisioning.
The Provisioning page appears. By default, this option is set to No.
- Click Edit.
- Change the Require Provision Note option to Yes.
- Click Confirm.
- Click Save.