This section describes how to configure Azure Active Directory (AD) for SSO authentication with the PCE.
Prerequisites
Before you begin configuration:
- Log in to the PCE as a Global Organization Owner.
- Navigate to the Settings > Single Sign-On page.
- Copy the following URLs, which you will need to complete the Azure configuration:
- Issuer: https://pce.xxxx:8443/login
- NameID Format: urn:oasis:names:tc:SAML:1.1:nameid-format:emailAddress
- Assertion Consumer URL: https://pce.xxxx:8443/login/acs/16884d35-036e-48c2-a685-c33f5458f407
- Logout URL: https://pce.xxxx:8443/login/logout/16884d35-036e-48c2-a685-c33f5458f407
Configure Azure
Only an Azure ‘Application Administrator’ can configure Azure AD.
To configure Azure AD:
- Make sure you have already configured the necessary Azure AD User Groups. You can verify this by logging in to your Azure portal and browsing to Azure Active Directory > Groups. Make a note of the Group names you want to use because you will need them later on.

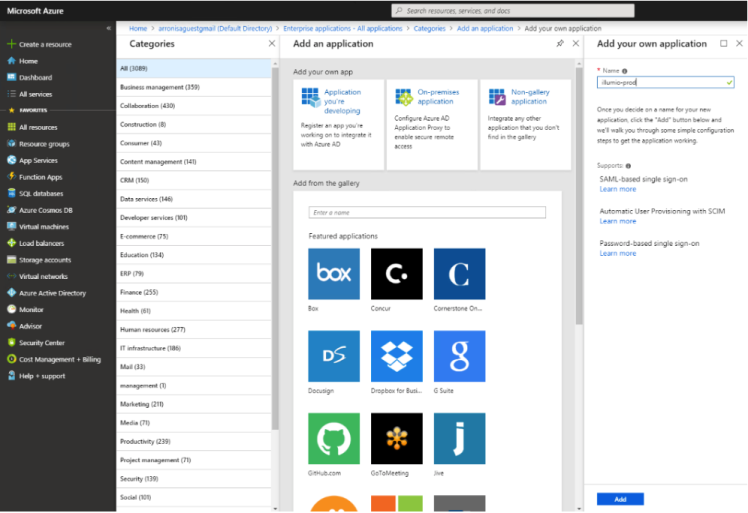
- Navigate to Azure Active Directory > Enterprise Applications > New application.
- Select Non-gallery application and enter a name, for example ‘illumio-prod’, and click Add.
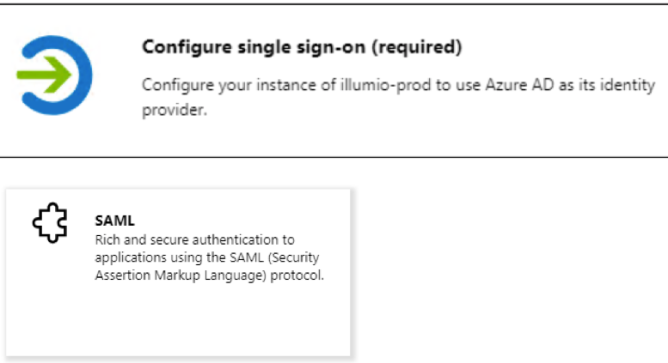
- From the ‘Getting Started’ option, select Configure single sign-on (required) and select SAML from the list of single sign-on methods.
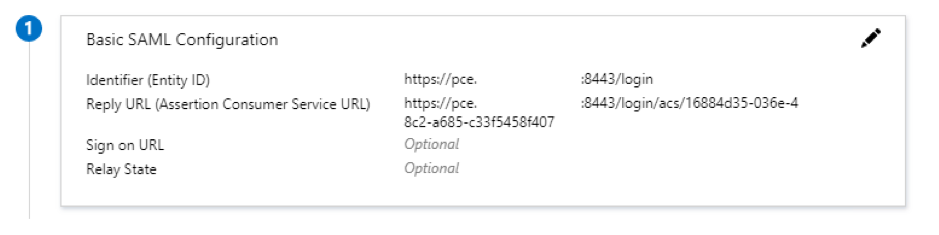
- In Basic SAML Configuration, enter the URLs that you had noted down in step 3 of Prerequisites.
- Identifier (Entity ID) = Issuer
- Reply URL (Assertion Consumer URL) = Assertion Consumer URL
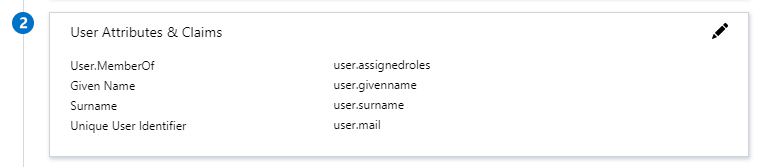
- Click the Edit button and enter the User Attributes & Claims configuration values.
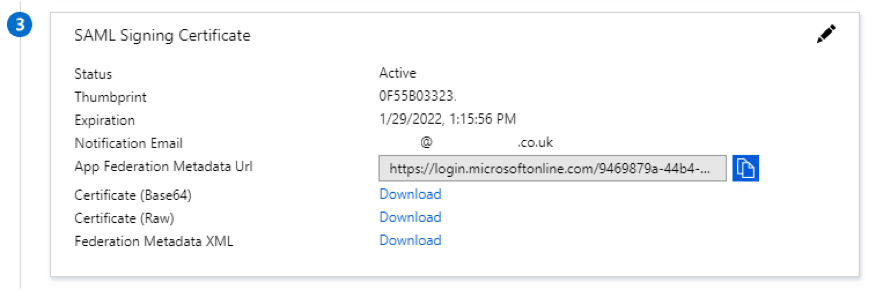
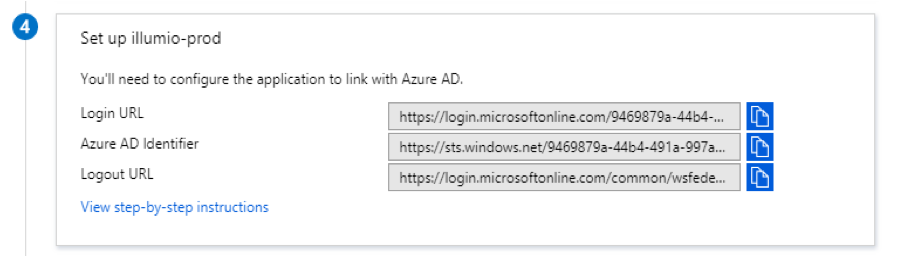
- Download Certificate (Base64) and save it locally.
- Download Login URL and Logout URL.
- Create the ‘Roles’ that will have access to the
illumio-prodapplication. - Navigate to Azure Active Directory > App registrations and select the
illumio-prodapplication. - Click ‘Manifest’ to open the
.jsonmanifest: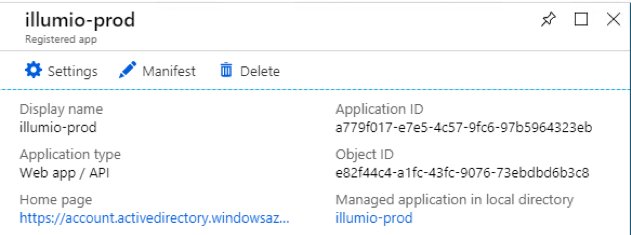
- Locate the
appRolessection of the manifest and enter:displayName: A display name.id: The Azure object ID for the group you are going to use.description: A description.value: A value for the Illumio role.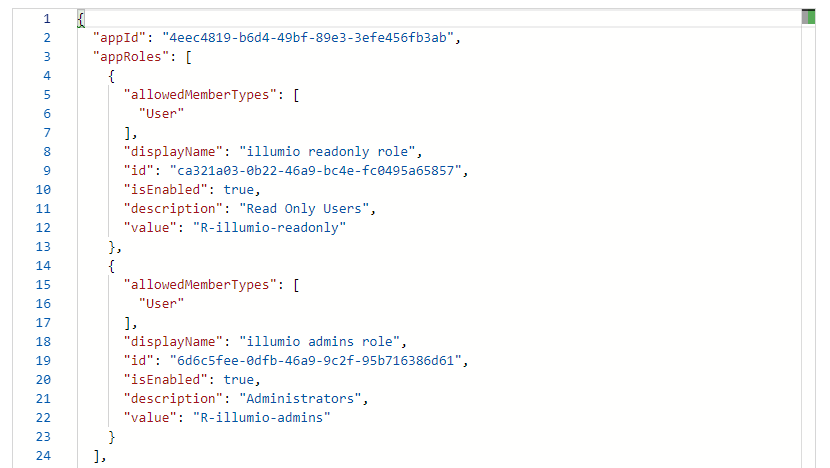
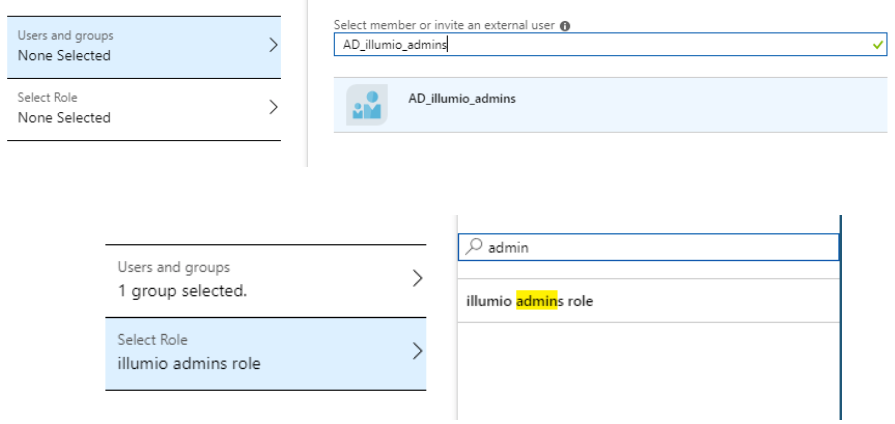
- Add the required users or groups to the
illumio-prodapplication and assign the necessary roles. - Navigate to Azure Active Directory > Enterprise Applications > illumio-prod > Users and groups.
- Click Add and select the Azure user or group you want to add and assign a role.
Configure PCE for Azure
Only an Illumio PCE ‘Global Organizational Owner’ can configure the PCE.
Before you begin, make sure you have the following information from your Azure AD:
- Certificate (Base64). See step 7 of Configure Azure
- Azure Login URL and Logout URL. See step 8 of Configure Azure
To configure the PCE for Azure AD:
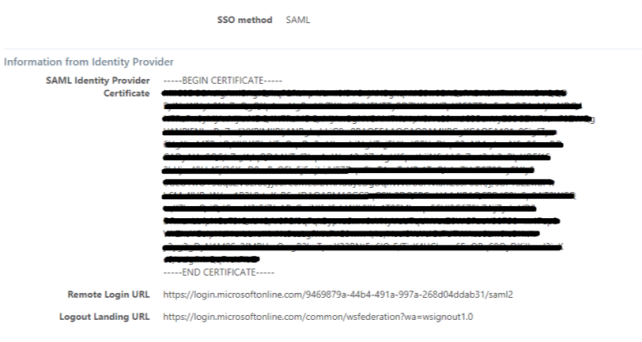
- Configure the Illumio PCE Single Sign-on SAML settings (information from the Identify Provider):
Log in to the Illumio PCE web console.
From the main menu, select Settings > Authentication.
Click Configure that is located next to ‘SAML’.
On the Single Sign-on Configuration page, click Edit.
Enter the following information:
- SAML Identity Provider Certificate: Paste your Azure Base64 certificate.
- Remote Login URL: Enter the Azure Login URL.
- Logout Landing URL: Enter the Azure Logout URL.
- Configure the Illumio PCE Single Sign-on SAML settings (information for the Identify Provider):
Select the authentication method from the drop-down list:
Unspecified: Uses the IdP default authentication mechanism.
Password Protected Transport: Requires the user to log in with a password in a protected session.
To require users to re-enter their login information to access Illumio (even if the session is still valid), select the Force Re-authentication checkbox (disabled, by default). This allows users to log in to the PCE using login credentials different than their default computer login.
Click Save.
NOTE:If SSO is configured both in Illumio Xpress and for the IdP, the preferences in Illumio Xpress are used. If SSO is not configured in Illumio Xpress, the default IdP settings are used.
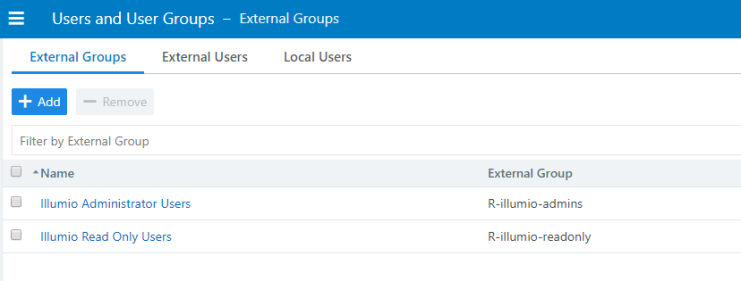
- Add external groups and assign the necessary global or scoped roles in Illumio RBAC:
From the menu, select Role-Based Access > External Groups.
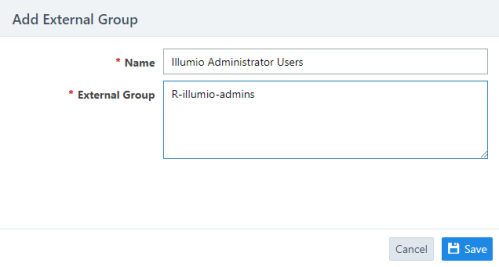
Click Add.
Enter a Name.
Enter an External Group name. This groups name must match the value you entered in step 8 (
value: A value for the Illumio role) in Configure AzureClick Save.
Repeat for additional groups.
- Select a group you created in the above step.
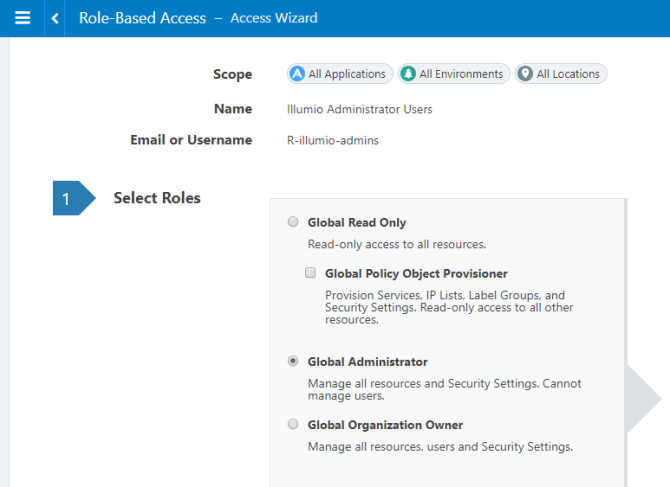
- Select Add Role > Add Global Role or Add Scoped Role.
- Select a Role and click Grant Access.
- Repeat for additional groups.
The PCE is now configured to use Azure AD for SSO authentication.