This topic explains how to navigate the Cloud Map in CloudSecure. For background information on the Cloud Map, see Cloud Map.
Ways to Move Around Your Map
You have these ways to navigate the Cloud Map:
- Use the filters at the top of the page to locate and zoom in to specific areas or resources; see Filtering the Map.
- Click anywhere in the map to refocus the view to that level. For example, you have zoomed in to an object. Click outside the cloud groups to refocus on the full map.
- Use the built-in map tools to zoom in:
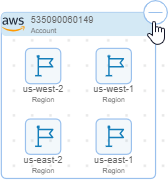
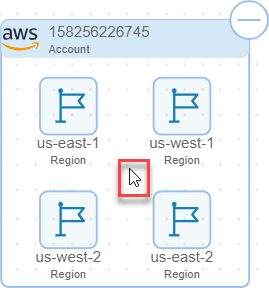
Click the plus (+) for a group to expand it:

To collapse a group so that you it's not expanded and you see the resources within it, click the minus (-) icon.
 →
→ 
Click the white space within a group to zoom in:
- Use the map tools in the bottom left-hand corner to:
- Map Configurations
See Configuring Your Map View. - Zoom map so everything fits on the page
- Zoom in
- Zoom out
- Map Configurations


Filtering Your Map Resources
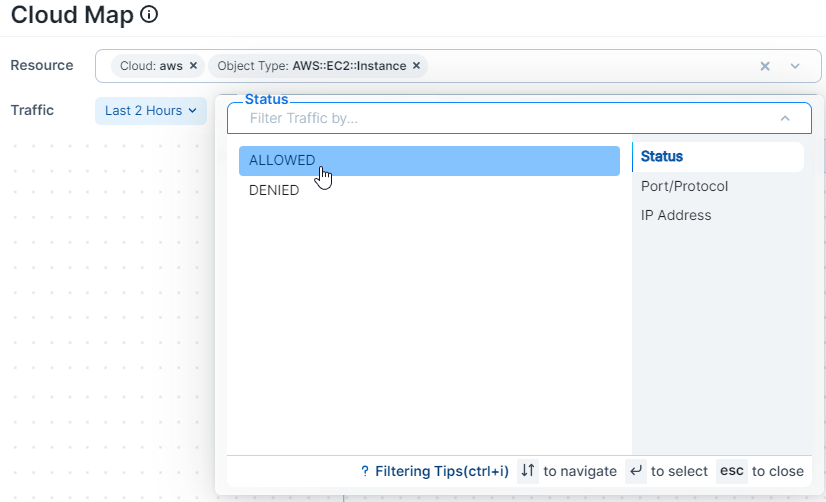
At the top of the page, the map includes a Resource filter. You can set one of several filters to show or hide different elements of your data and focus your map on what is most important to you.
The Resource filter includes several options, including Cloud, Account ID, Region, Object Type, VPC/VNET ID, Subnet ID, Cloud Tags, and others.
By default, when you first open your Cloud Map, the Resource filter is empty. The map displays groups for each of the clouds you have onboarded — AWS and Azure. Next, it displays the accounts you've onboarded from each of those public clouds.
When you are filtering for resources that support displaying traffic flows, the map includes a traffic filter to help you narrow the traffic flows to display:
As you use the filters to manipulate the map display and display details about accounts and the resources in them, CloudSecure might display a message that it can't display all the results for your query because your filter results would display more than 2,000 resources or more than 10,000 traffic flows. When this happens, refine your query so that it is more focused and returns fewer results.
For information, see Limitations for Using the Cloud Map.
Configuring Your Map View
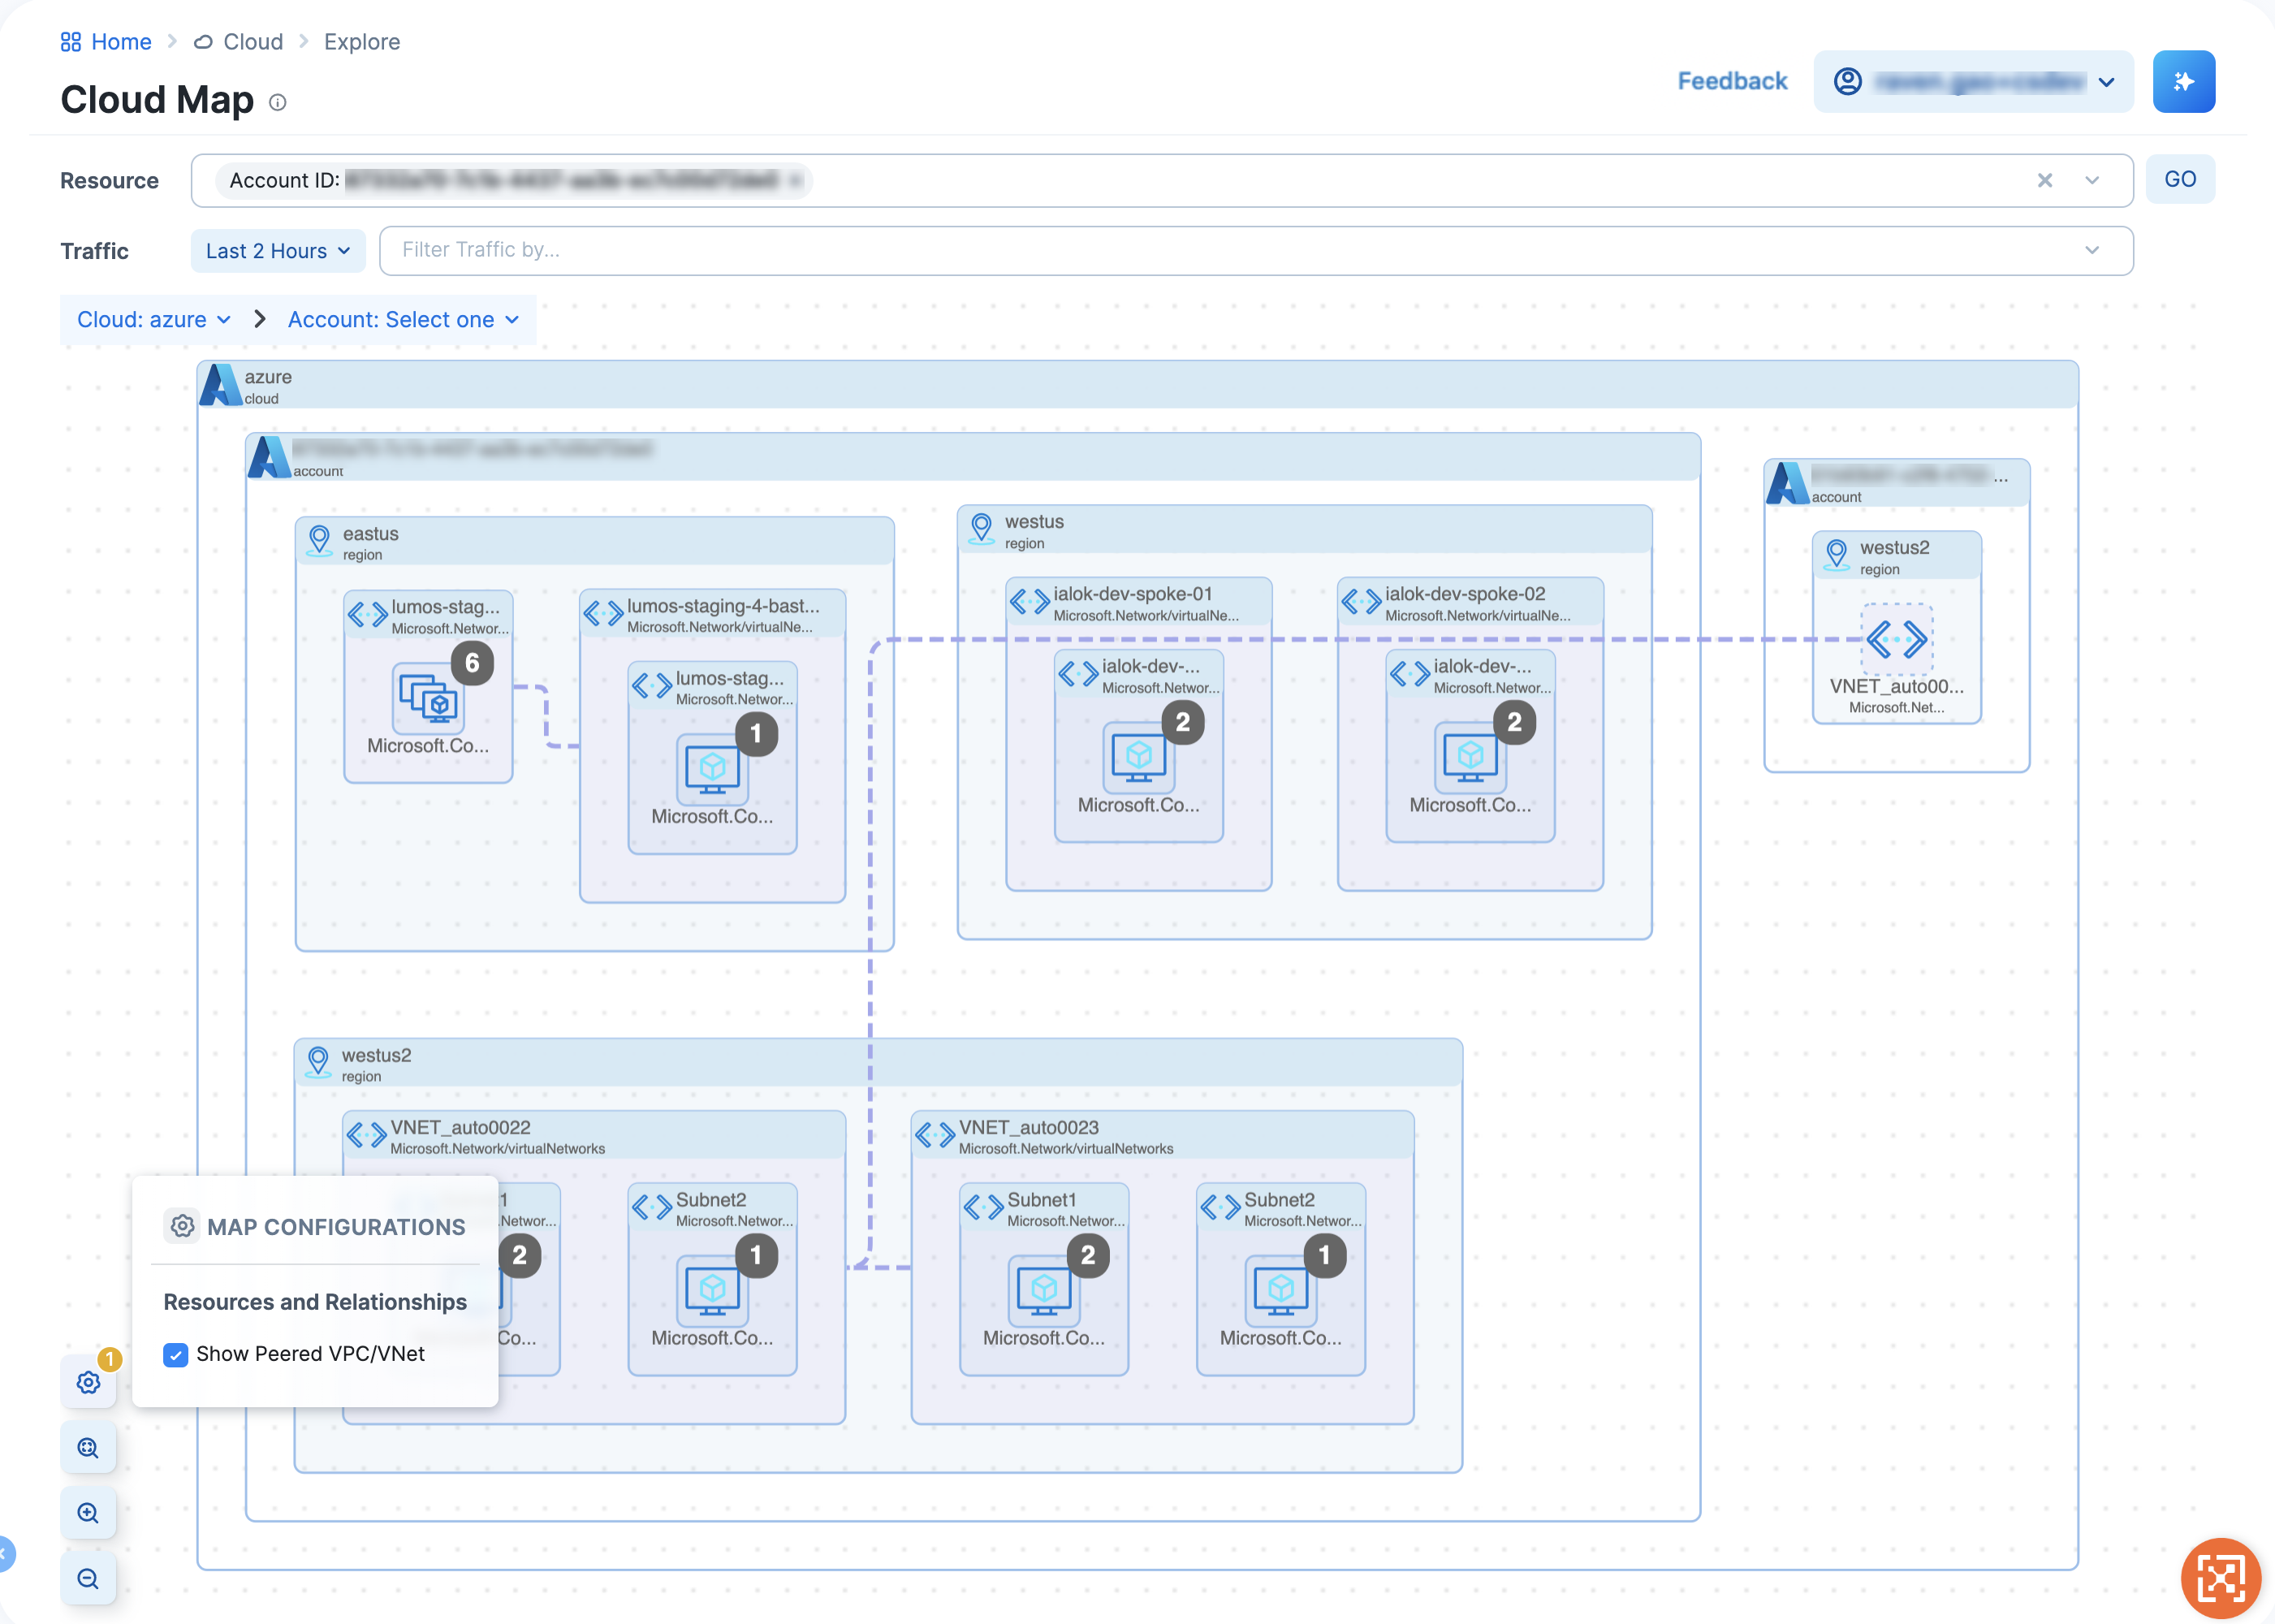
Click the Map Configurations button, which has the gear icon, to open the Map Configurations panel. Under the Resources & Relationships portion of the panel you will see checkboxes for showing relationships between specific types of resources. These are unchecked by default. If you check one or more of them, the map will stop displaying anything from your filtered results that does not correspond to checked boxes.
For example, if you check the box for Show peered VPC/VNet, all resources not associated with a peered VPC/VNet will be hidden, as seen in the following figure.
Some things to remember:
- The Map Configurations button will appear only when your filtered results contain items that have corresponding checkboxes in the Map Configurations panel
- If you check one or more boxes in the panel, a numeral appears in the upper right-hand corner of the Map Configurations button to remind you that you have non-default view configurations in place
The panel has checkboxes for the following resources:
- Peered VPCs/VNets
- VPC/Private Endpoints and associated resources
Display Resource Side Panel
When you click a resource in the map, CloudSecure opens a right-side panel that displays the resource metadata. For example, you can click an EC2 instance to see a summary information about the resource.
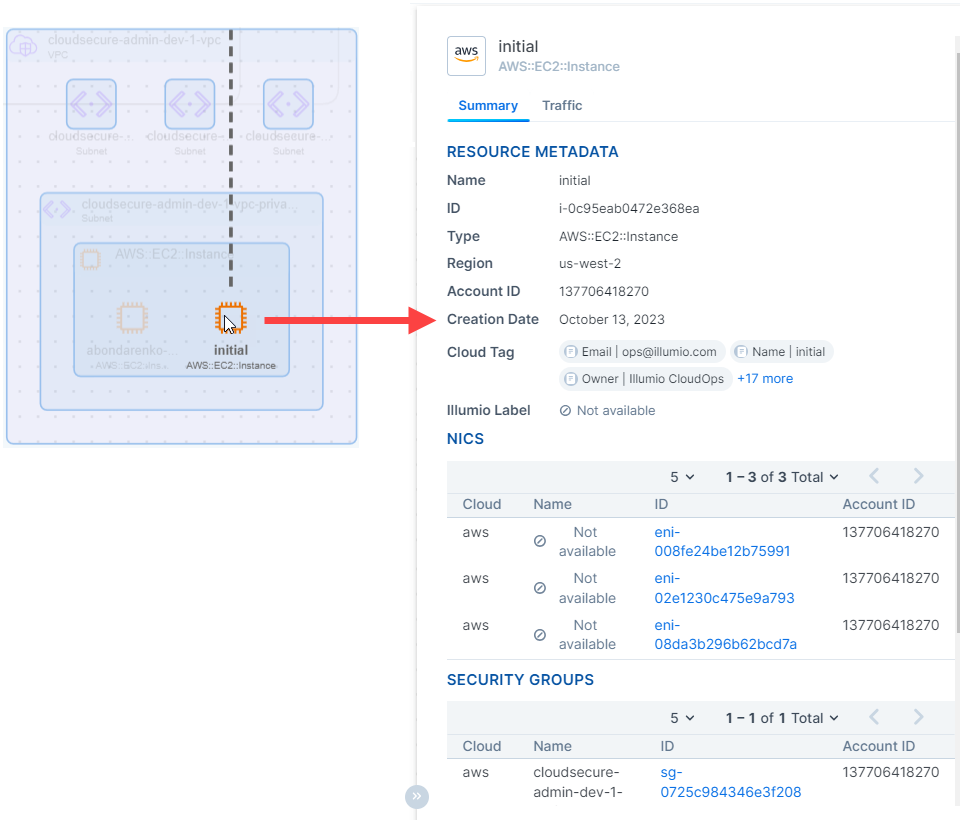
When you open a VM (Azure) or an EC2 instance (AWS) the right panel will include a Traffic tab. The Traffic tab displays when that resource is sending or receiving traffic. In the tab, you can view information for the flows, such as source and destination, label sets, port/protocol, associated security groups, packet counts, etc.
At this time, the Cloud Map only supports displaying traffic data for VM (Azure) and EC2 instance (AWS) resources. For resources that don't support displaying traffic flows, the panel includes a Summary tab only.
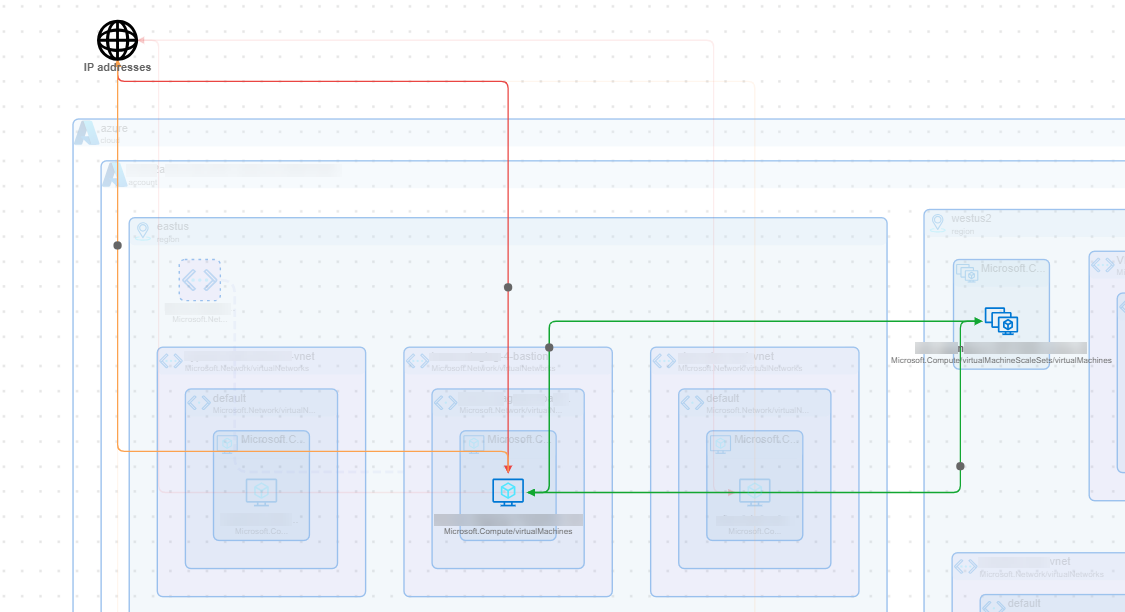
Cloud Map Traffic Lines
The Cloud Map includes solid traffic lines for resources that are sending and/or receiving traffic. Flows that are one direction are displayed with a single arrow line. Bidirectional flows have dual arrows.
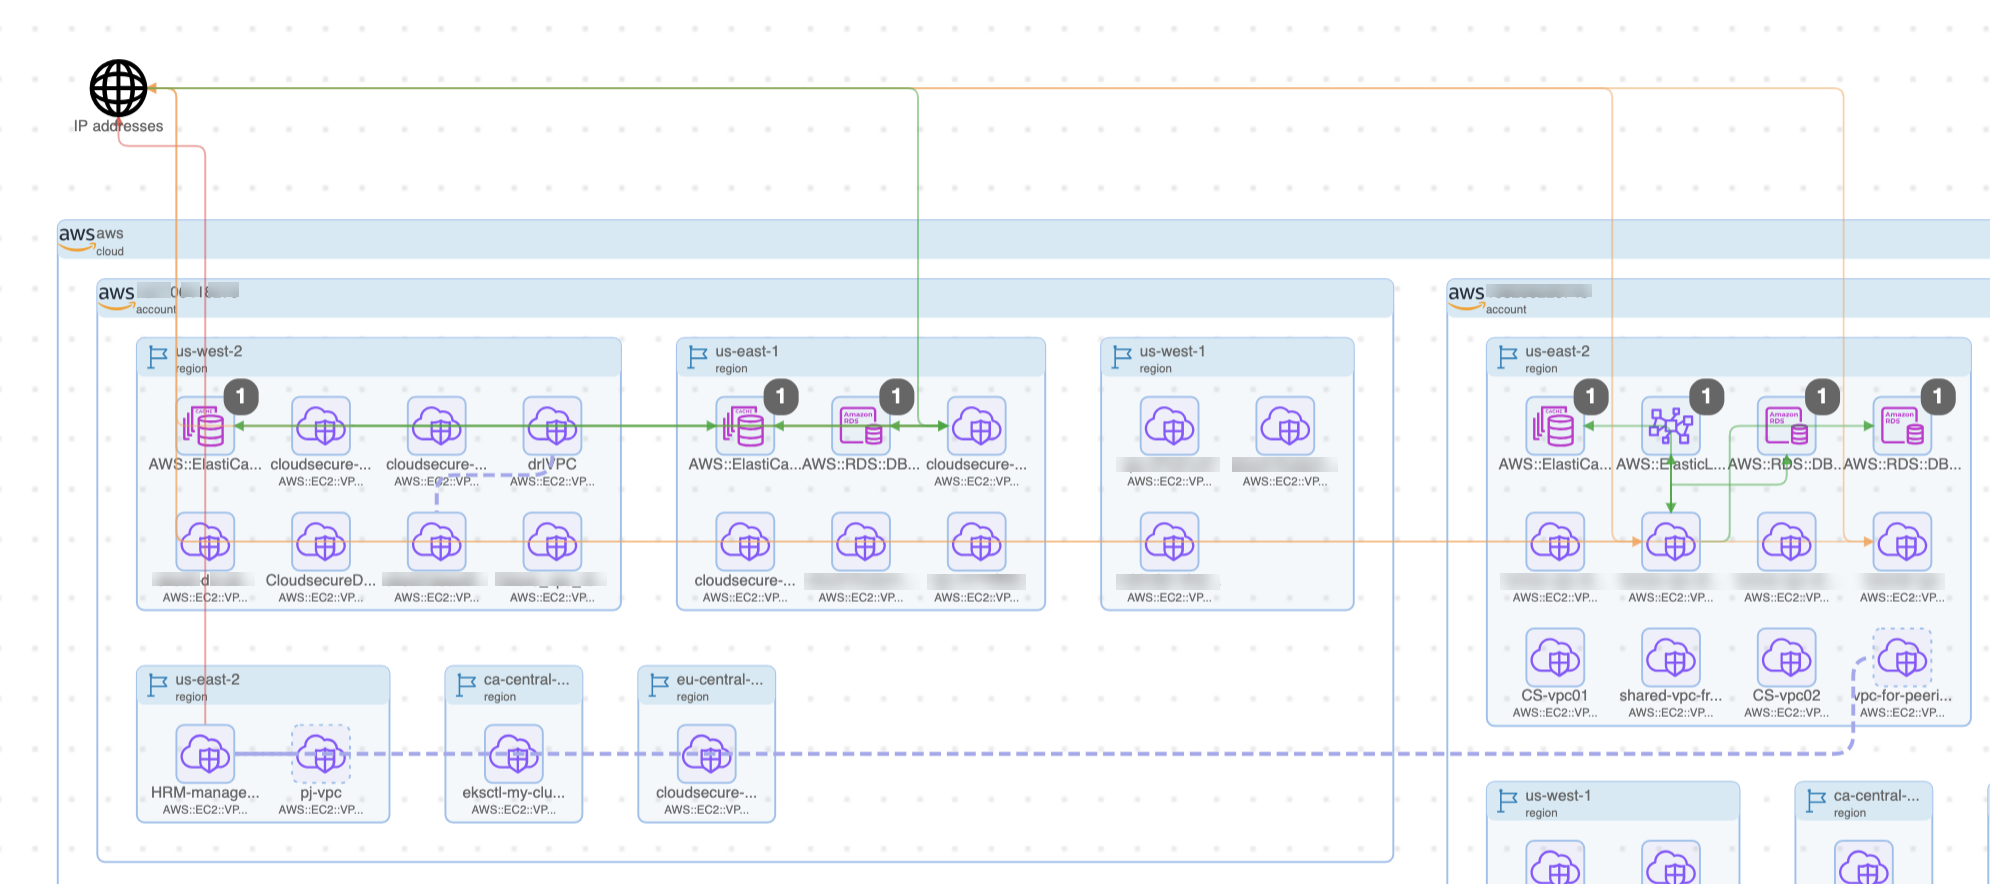
Orange lines indicate mixed state (both denied and allowed) traffic. Green lines indicate allowed traffic. Red lines indicate denied traffic. These traffic lines are displayed from the lowest level node selected. For example, you may have green lines between two regions, indicating that strictly regional traffic is enabled. However, if you drill down, you might see a pair of resources, one in each region, with mixed state traffic between them. Dotted lines indicate relationships rather than flows.
When you select a traffic line, a Traffic Details panel will open, showing flow status, source, destination, and the like. When you hover over a traffic line, the map shows an animation of the traffic flow for just that traffic line. Similarly, when you hover over a resource displaying a traffic line, the map refreshes with an animation of the traffic flow for just that resource. This animation isolates the traffic flow for only the resource of interest. Using hover is a good way to isolate a resource and see at a glance all the flows from that point of view coming from and going to that resource. To stop the animation, simply move your cursor to another part of the map.